Showing posts with label upcycling. Show all posts

Sunday, 24 May 2015

Azerbaijani Dress

My lovely friend Ella decided to host a Eurovision party this weekend.

We were each given a country and we had to come dressed as if we were from that country and bring food from the country.

The country that I got was Azerbaijan, and they wear a rather traditional princess-like dress. A friend of mine had given me an old dress of hers last year, and although it would not do up when I tried it on I thought that I should be able to do something with it.

As the pictures show below, it doesn't do up on my mannequin which is the same size as me. This was problematic because I had to consider what to do: whether to unpick some seams and try to let it out or whether to add a panel?


I decided to unpick the zip completely because it was starting to come away from the seams anyway and I thought that I could add something to the back that meant that a different zip was needed or a different technique. However, I decided to leave the small section of zip that was in the skirt in place because there was more fabric involved that complicates the situation.


On the back I decided that eyelets would be a good way to fasten it. They are fiddly, as I know from the cushions I made, but they would provide and attractive and efficient method of making it fit me.

To begin with, I drew crosses from the top every 5cm to mark the places where I would put the eyelets: 


Then, I used the tool that is supplied with the set and a hammer to punch holes into the fabric. This proved difficult because the flimsy plastic gadget that comes with it snapped early on and I had to use multiple pieces of wood to hold it together.

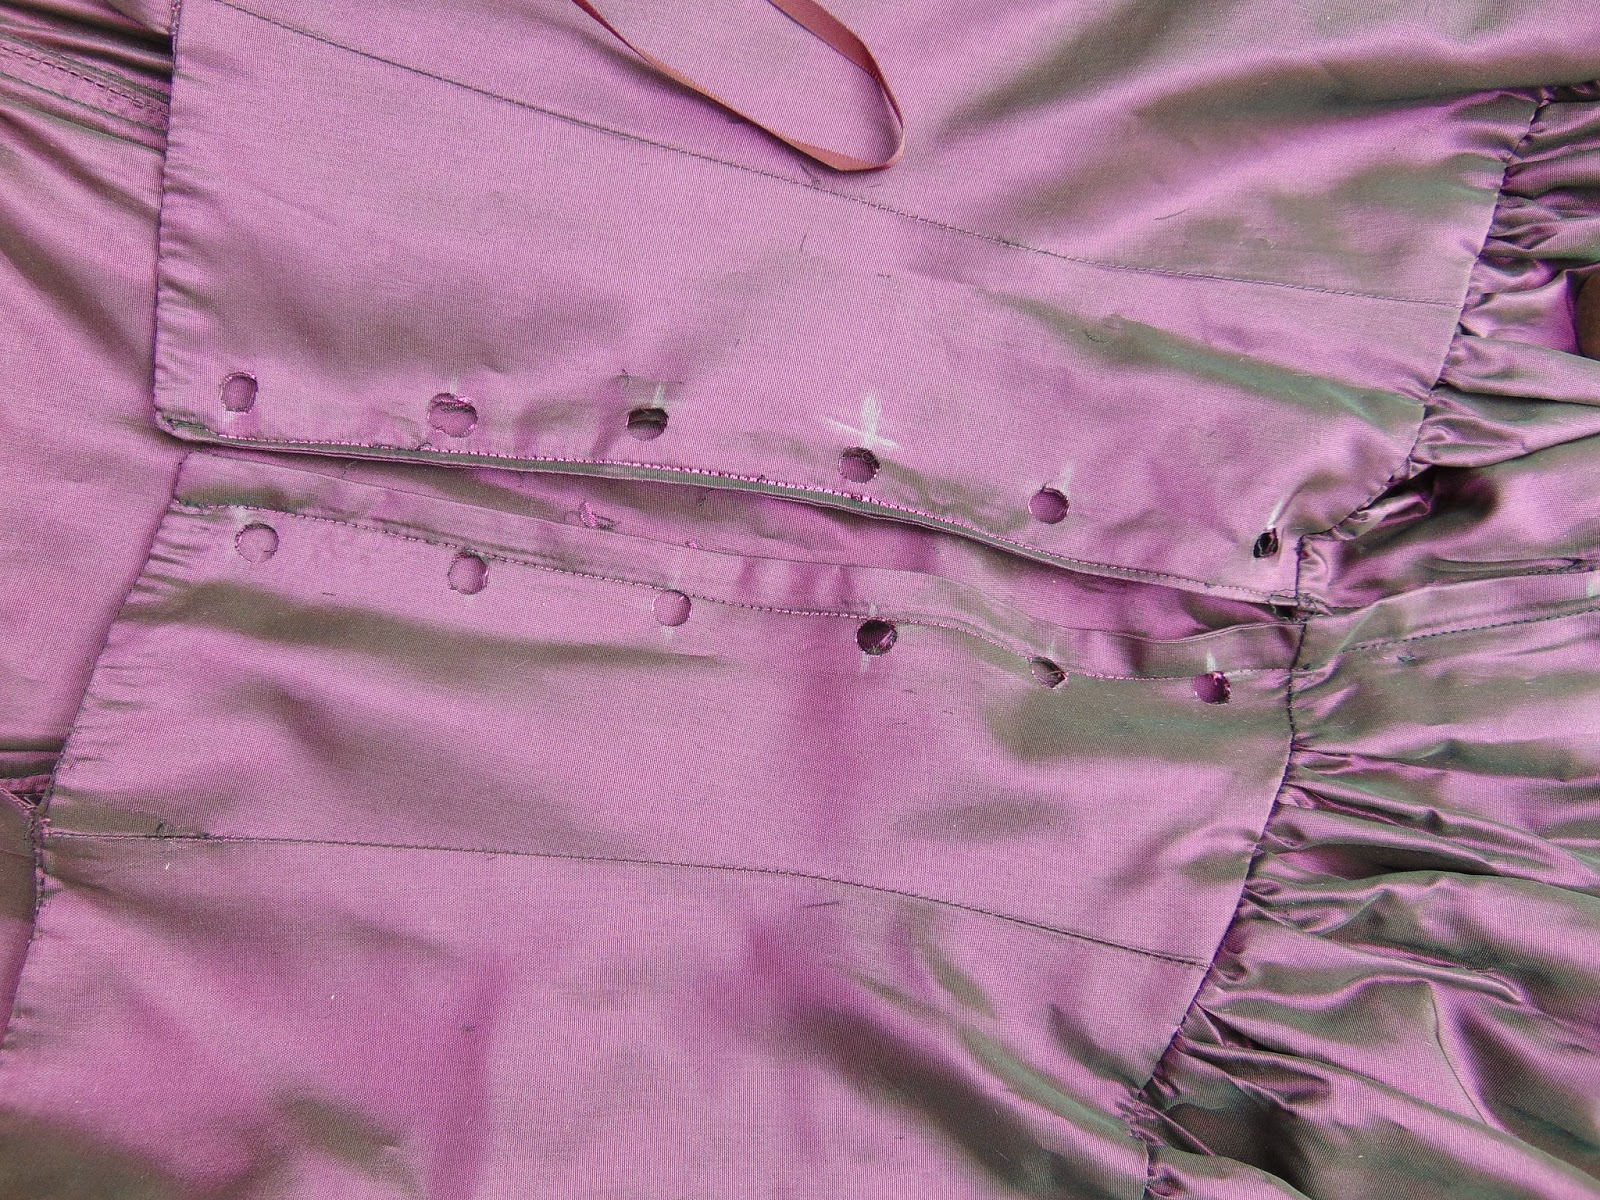

Once I had made all of the holes, I punched the metal hoops through. They were also difficult to do because the cracked plastic thing was not helpful, and the metal warped a couple of times when the surface was slightly uneven.


However, when they were finally finished, they looked very effective with the ribbon in and it now fitted so that I could wear it.


One of the main features of Azerbaijani dress is the headpiece, which often features a crown-like piece and a veil. I found an old belt in our dressing up box that I thought would be appropriate to act as a headpiece, and some white organza left over from another project for a veil.


I cut the organza into a half-doughnut shape; the smaller curve had a diameter of the length of head band that I wanted it sewn on to, and the larger curve was made as big as possible. Then, because I do not have an overlocker, I zigzag stitched around the outer edge of the fabric, pulling it tight as I did so, in order to create the slightly frilly effect.


Then, I pinned the smaller semi circle curve of it onto the belt (after placing the belt on my head and finding the point where it comes level with my ears), pinning the edge of the fabric to the flat underside edge of the belt. I stitched the fabric on by hand in a small running stitch, ensuring that the edges stayed together to let the curve affect the fall of the fabric.


Then my Azerbaijani costume was complete! I wore my prom shoes with it because they are a silvery purple colour that complimented it well.


Sunday, 28 September 2014

Jazz-up Your Boring Shirts


Mum gave me an old shirt of hers that she didn't like, and it was really dull and I would never have worn it. So I decided to upcycle it into something that I was more likely to choose from my wardrobe. First of all, I took it up, literally by cutting along the bottom then doing a rolled hem. Easy peasy.


Then I added some leatherette on the collar to make it more defined and more interesting.


Then I cut a pocket off of an old pair of shorts, and, after unpicking the original pocket, I sewed it on. Then I added a line of studs from the shorts, just 'cos I felt like it.


That is all I did for this shirt, but I had a lot of ideas that I was thinking of doing, so there will be some more in the near future...

Sunday, 6 July 2014

Men's Work Shirt = Women's Strappy Top

Before: (with the sleeves cut off)


After:

I used:
- Blue swallow edging
- Shirt
- Thread
- Machine

How?:
1. I first of all cut off the sleeves, as shown in the first picture, because I had planned to make a short sleeved top instead.
2. Then I cut the collar off to see what it looked like.


3. At this point I changed my mind and decided to cut underneath where the sleeve holes end.


4. Then I put it on inside out and pinned straight down the side seams to make it fit. Then I took it off and sewed down that line using a straight stitch.


5. Then I cut off the excess fabric and zigzag stitched the raw edges.
6. I bound the top using the blue tape - I ironed it in half first, then went around the top pinning into place. I then sewed with a straight stitch, but as it began to come apart in places I went over it in a zigzag stitch. At this stage I made the two layers of fabric where the buttons are separate, but as this was difficult, I...
7. ... sewed down the front next to the buttons to permanently close the front together.


8. Then I made the straps (0.5cm wide). I did this by measuring a 2cm width bit of fabric (left over from the sleeves or from the top of the back) of the desired length, then ironing a crease in the centre (1/2 along) (1cm from the edge), and at 1/4 along (0.5cm from edge), and at 3/4 along (1.5cm from edge). I sewed the edges into the centre, folding on the 1/4 line and the 3/4 line. Then to finish I folded on the centre line and sewed straight down to make the strap. Then I repeated this whole process for the other strap.
9. I sewed them in by putting the garment on and pinning the straps on so that they looked right, basically! In the end they were 10.5cm from the centre at the front (either side of the buttons), and 4cm inside the darts at the back.

Monday, 2 June 2014

Ten Tips When Upcycling

(1) Even if you are not constantly making things, for every item of clothing/bag/shoes that you have to throw away, make sure that you cut off any zips/buttons/poppers/buckles/anything that would be useful.
(2) Sketch all ideas first. Even if you know exactly what you are doing, just double check that it does what you want it to do.
(3) Experiment with new ideas. After all, the clothes you are using were previously unwanted, so it doesn't matter if you make a mistake, right?
(4) Unpick and sew again until you get it right. Never think 'Oh that will do' when making, because it will only mean that it will be more difficult later.
(5) Always tack (or at least pin) before sewing.
(6) Test the sewing machine on scrap fabric first - simple I know but the amount of times I don't bother and something goes wrong is a lot!
(7) Use the right colour thread, even if it means buying more. There is nothing worse than two pinks clashing.
(8) Use a well lit working area. Invest in a cheap spotlight or two to shine on your work, especially if you do most of it in the evenings.
(9) If you are stuck for inspiration, make a mood board.
(10) Most of all, enjoy it - put some music on. Remember that this is meant to be a hobby, not a stress!

Sunday, 27 April 2014

Hello and Welcome to My Blog!

Hi Everyone!

The focus of this blog is on upcycling (turning old, unwanted things into something new). I will upload pictures of my projects, along with how I did them. I cannot guarantee regular updates, but I will upload some of my older projects to begin with.


thatupcyclingqueen

Related Posts Plugin for WordPress, Blogger...